Top mistakes when wallpapering (and how to fix them!)
Jan 20, 2023
TIPS
Top mistakes when wallpapering (and how to fix them!)
Wallpaper is the ideal solution to bland walls and introducing a bold statement to the interior has never been easier with the vast choice of designs and colours now available from our large choice of brands! Adding a feature wall or texture to all four walls is the perfect way to add depth and interest to plain spaces. While we always suggest a professional decorator hangs your wallpaper for you, we appreciate the budding DIY enthusiasts among us want to have a go ourselves (and save ££ in the process!). Although it could be daunting, hanging your own wallpaper can be very rewarding, so you want to make sure you are prepared to avoid common mistakes before you start. We have created a comprehensive list of common mistakes which can be avoided when it comes to hanging your dream wallpaper!
Have the right tools for the job
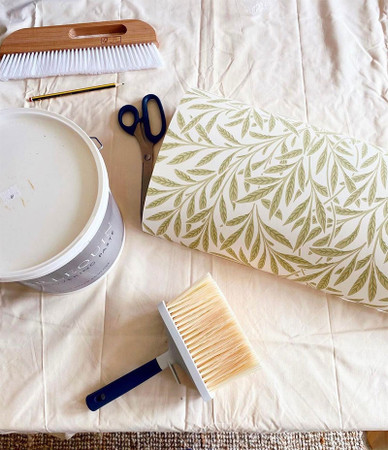
Before you start your decorating, it is important to have the correct tools for the job to set yourself up for success. A common mistake is failing to prepare when carrying out your DIY project. We recommend your decorating kit includes the following:
- Pasting table (if your wallpaper is paste the paper)
- Something safe to stand on e.g., ladder
- Knife
- Scissors
- Plumbline or spirit level
- Lining Paper (if applicable – see below)
- Wallpaper Adhesive
- Tape Measure
- Dry & Clean paint roller
- Seam Roller
- Dry brush
- Pencil
1. Not ordering enough wallpaper
So, you’ve started hanging your wallpaper, and realised halfway through you don’t have enough! Avoid this nightmare scenario by ensuring you have enough wallpaper before you start the hanging process (remember, measure twice – order once!).
We would always recommend a decorator advises how many rolls you need to order, however if you need help our customer service team are at the other end of the phone or an email away to estimate how many rolls you may need. To get the most accurate measurements, measure from the top of the skirting boards to the ceiling, and the width of the wall you are decorating, and provide the measurements exactly as they are. We also offer returns on all wallpapers we sell (unless stated cut to order/special order item - see FAQ’s), and we can reserve extra rolls in the same batch for 2 weeks if you are unsure!

2. Fail to prepare – prepare to fail!
Prep work is the key to success when hanging wallpaper in your home, this is a crucial step worth taking the time to get right. Assess the wall you are going to hang your wallpaper on and ask yourself the following:
- Is my wall all one even, light colour? (Any dark patches may show through the wallpaper, so it is important your wall is a light, uniform colour)
- Is my wall smooth?
- Do I need to replaster any areas? (If yes, ensure your wall is sized once the plaster is completely dry – this is performed using a diluted wallpaper paste solution as many times as necessary. Allow time to dry fully before decorating).
- Does my wall require lining paper? (This helps to smooth the wall of minor imperfections)
Once the necessary preparations have been made to the wall, you are ready to hang your wallpaper!
3. Read the instructions
The instructions for each individual wallpaper are your best friend and are commonly found on the back of the label within the roll, no wallpaper is the same so the hanging method should not be treated as such. Before hanging any wallpaper, familiarise yourself with the instructions for the particular wallpaper, this includes checking the pattern match if there is one, the pasting method, any soaking time if necessary, washability and correct adhesive required. We always recommend using a good quality, ready mixed adhesive (unless a brand specific adhesive is specified by the manufacturer), brands such as Harlequin, Romo, Sanderson and Belgravia offer a good quality adhesive suitable for most wallpapers. Some rolls are reverse rolled, meaning each length cut needs to be turned around so the pattern is facing the right way before hanging.
Take a moment to familiarise yourself with the common wallpaper symbols seen on labels.

4. Wallpaper issues during hanging
Wallpaper bubbles can occur during the hanging process, but can easily be rectified! When hanging a sheet of wallpaper, it is tempting to smooth the sheet from top to bottom, the best method to avoid bubbles is to smooth from the centre out. If bubbles still occur, you can prick the bubble with a pin while still damp and ease the air out, the wet adhesive behind should then make contact with the paper.
Whilst decorating avoid getting any adhesive on the front of the paper, however, should any seep onto the front of the wallpaper, if the individual instructions allow, use a slightly damp cloth to wipe the excess from the front, it is important to do this quickly before it dries to avoid marks.
If loose dirt appears on the front of the wallpaper, use a dry duster to lightly wipe this off.
We hope this post has given you confidence to hang your own wallpaper! If you need any further information or guidance you can contact our sales team by phone or email for advice – happy decorating!


